
- 1 Introduction
- 2 Overview
- 3 Shared project
- 4 Web API
- 5 UserService
- 6 AuthController
- 7 Test login
- 8 Policy guarding
- 9 More guarding
- 10 The WeatherForecast
- 11 Blazor
- 12 Wrap in auth
- 13 AuthService
- 14 AuthenticationStateProvider
- 15 Login page
- 16 Login buttons
- 17 Test login
- 18 Auth functionality
- 19 Block page access
- 20 The auth context
- 21 The auth state
- 22 Conclusion
- 23 Optimization
Welcome
This tutorial will take you through how to set up a simple login system for Blazor-WASM in combination with a Web API.
This approach will use your own User/Profile/Account type, or whatever you call it.
We will not be using the Identity framework. That's a different approach.
We will go through how to set it up from a new default Blazor-WASM project and default Web API. Later, you can then reuse the steps to add login/authorization functionality to other (existing) Blazor-WASM apps or Web APIs. The intention is, that this approach can be applied to an existing system without too much trouble.
Overview
We are going to use an approach called JWT authentication.
This means that when logging in through the front end, the request is sent to the Web API, and (if the credentials are valid) a JSON Web Token (JWT) is sent back again, containing various information, including information about the User profile.
We are going to use a Web API for the back-end and Blazor-WASM for the front end.
We will use various built-in tools in Blazor to manage authentication and authorization of various sites of the app.
We will secure our Web API endpoints with authentication and authorization too, so that other programmers don't just create their own app and abuse our endpoints.
Disclaimer
The purpose of this tutorial is to get a login-system up and running, but not necessarily understand every detail. There will be black box magic moments, where the interested reader can do further research.
The actual security of this approach is somewhat uncertain. There are more considerations to take, if this is to be used on production. It is left to the reader.
Result
The final project can be found on GitHub here
Overview
First, an overview of the resulting system is presented.
We are going to need 3 projects/components,
- The Web API
- Blazor WASM
- A shared library for classes/functionality needed by both projects (not strictly necessary).
The various endpoints of the Web API will be secured by policies and whether the endpoint, when called, is given a valid JWT. So, un-authorized/un-authenticated requests to the Web API will automatically be refused.
For the Blazor app, the authentication/authorization will be used to show/hide various parts of the UI, i.e. you can only see certain pages, tabs, buttons, etc, if your logged in user has the correct privileges.
The same policies will be used for both Web API and Blazor app. These will therefore be defined in a shared library.
Component diagram
The below diagram shows the dependencies between our three projects.
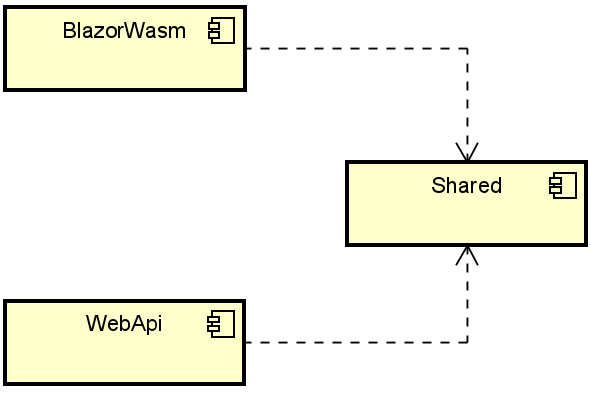
You could put an arrow from BlazorWASM to WebAPI, as HTTP requests are made from Blazor to the endpoints in the Web API. But that dependency is not explicit in the code, it is left out.
Class diagram
The below class diagram shows the end result. It may not be an exact match, as the last part of this tutorial will contain some optimizations, resulting in changes to the system. Probably. According to the plan. At some point.
First the overview is provided. Below, various parts of the diagram will be explained in detail.

The grey boxes are projects (components). Below, each project is discussed.
Blazor app
This is the Blazor app.
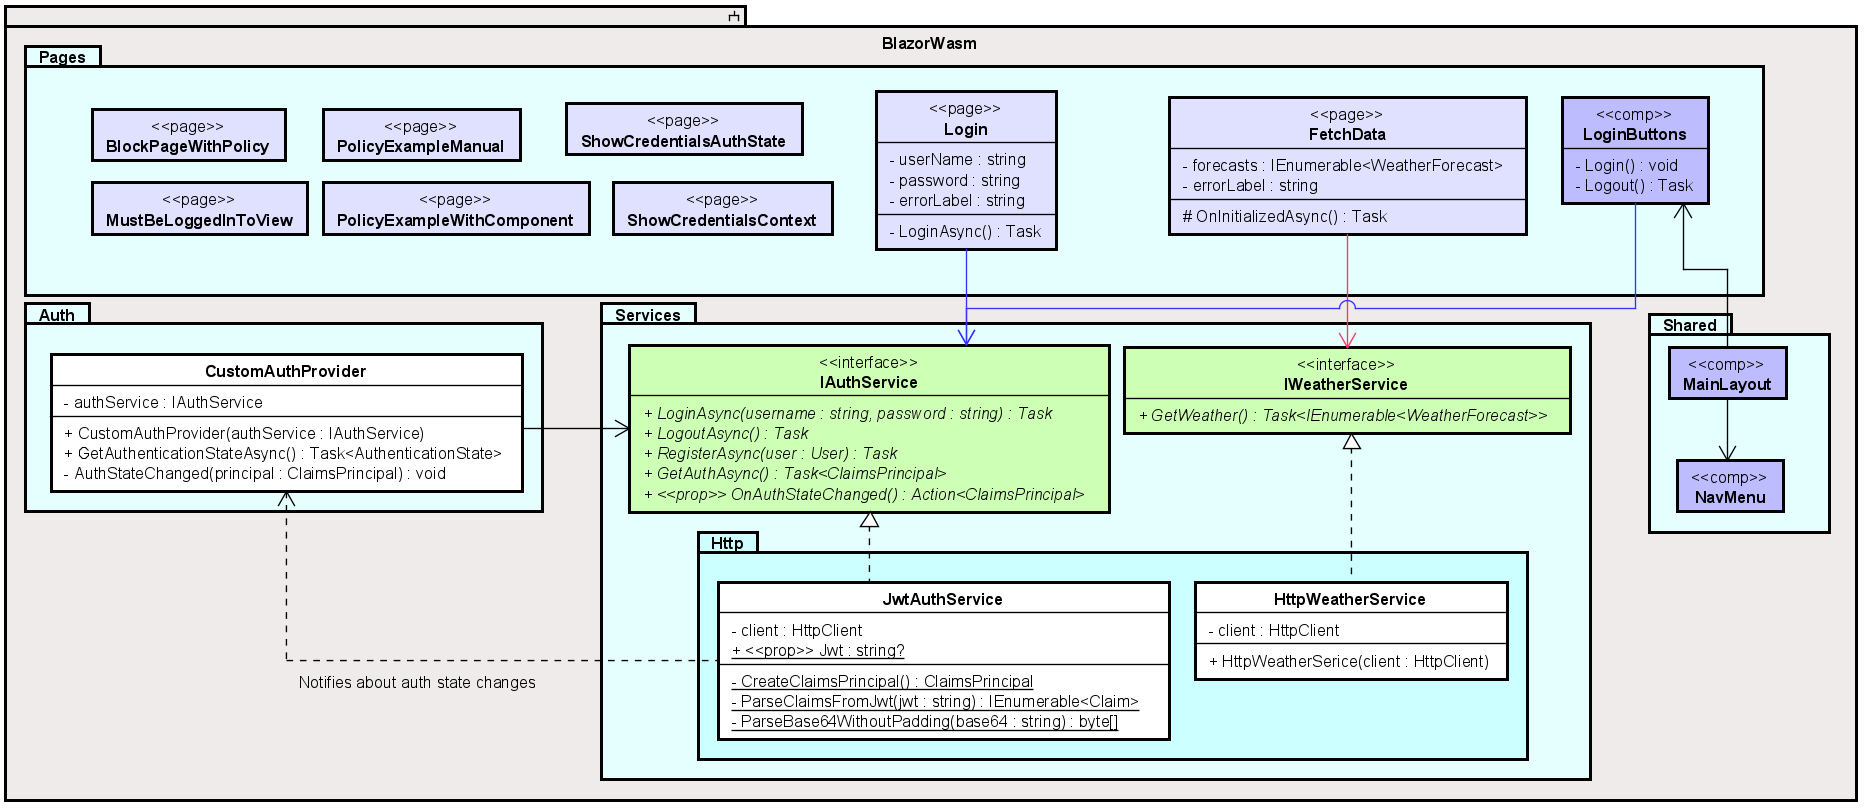
Notice how Blazor pages are marked as the stereotype <<page>>. Similarly, components are marked <<comp>>.
Most of the pages don't do much in themselves, they are just there to demonstrate how to show/hide parts of the UI based on the authorization state. These "dumb" pages include: BlockPageWithPolicy, MustBeLoggedInToView, PolicyExampleManual, PolicyExampleWithComponent, ShowCredentialsAuthState, ShowCredentialsContext.
The Login page is used by the user to log in. The credentials are forwarded to the IAuthService, and the implementation, JwtAuthService will
make a request to the Web API.
Once the response is received, a notification is sent to the CustomAuthProvider (through a delegate), which will cause an update in the UI according to the new
authorization state. I.e., the dotted arrow from JwtAuthService to CustomAuthProvider does not in this case mean a "dependency", I have abused notation a little.
It just means a notification is sent. Think observer design pattern, using a delegate.
The FetchData page is included in the Blazor template, i.e. it is there upon creation. We keep it to show how to get data from the Web API, by using the IWeatherService, and its implementation, HttpWeatherService.
The LoginButtons is a component used by the MainLayout to give a little login-icon on the top-right of the app. This will be elaborated upon later.
Finally, the CustomAuthProvider is the class responsible for providing the Blazor app auth functionality with the authorization state (i.e. who is logged in, if any).
You may notice the method GetAuthenticationStateAsync().
This method is called by the Blazor framework, whenever there is something in the UI which needs to know about the authorization state. If you wish to show/hide a button, the Blazor framework will ask this class, through this method, about the currently logged in user, and based on that user's credentials, the button will be either shown or hidden.
CustomAuthProvider does not know about the user itself, but asks the IAuthService about the credentials every time.
Shared
This component contains classes and features which both the Blazor app and the Web API needs to know about.
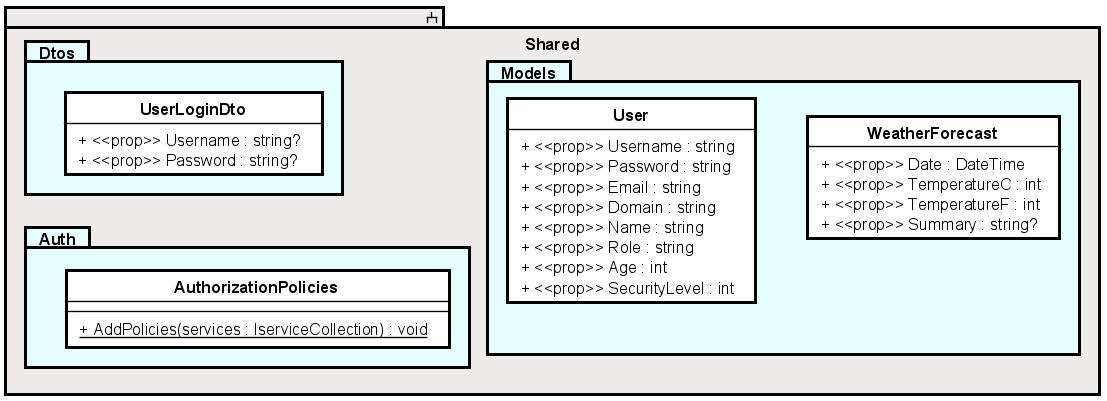
All model classes are put here, so that we do not need to have copies of User in both Web API and Blazor projects.
We have the Data Transfer Objects here (DTOs). Whenever you need to log in, you just need to provide a username and a password. We could have used the User class to send this information from Blazor to Web API, and just leave most properties empty. But it is common practice to create specialized Data Transfer Objects, which contains just the properties needed. It is up to you, which approach you will use.
The AuthorizationPolicies is a class, where we define policies. The policies are the same on both Blazor and Web API, so they are defined here, to be used by both programs.
Policies are set of rules to be used to either provide or block access, based on a users credentials. For example:
- You can only view this image, if you are older than 18
- You can only click this button, if your email is from VIA
- You can only access this page, if your security level is above 3
The same applies for the Web API:
- You can only call this endpoint, if you are older than 18
- You can only call this endpoint, if your email is from VIA
So, we can use policies to control our UI, and we can use policies to guard our Web API endpoints, so they are not just open to the entire world. That is potentially very dangerous, as anyone can create and delete our data.
Web API
This is the Web API:
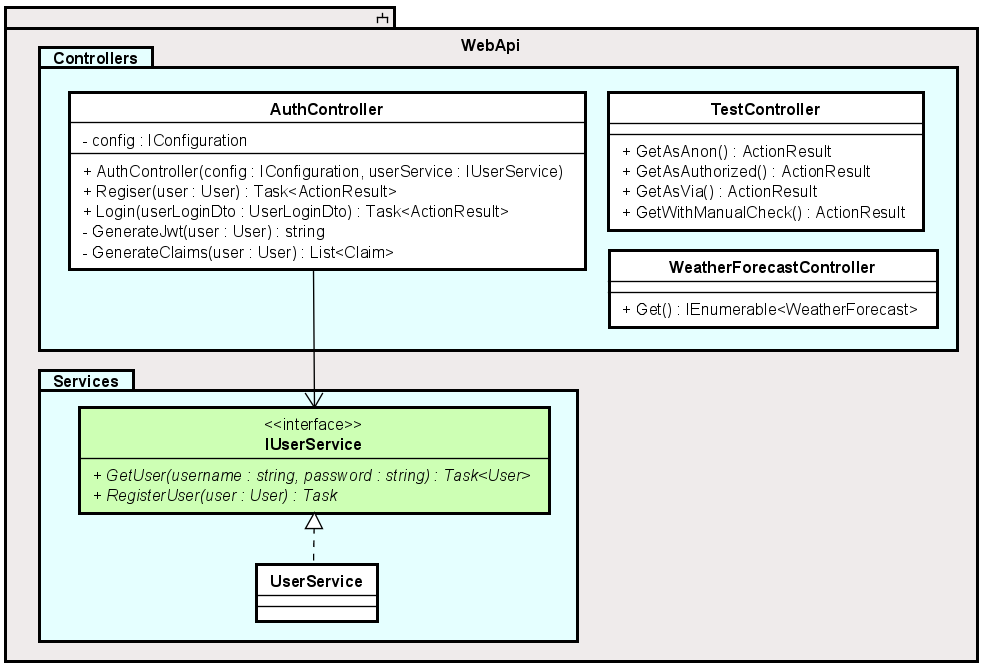
The AuthController is used to login, and return a JWT. You can also register a new User here, however, that is not really included in this tutorial, and instead left to the reader to implement. If they wish.
This class will use the IUserService to validate the login credentials, and if valid, will generate a JWT and return it to the caller, i.e. the Blazor app.
The TestController has a few dummy endpoints to demonstrate how to use policies, and other approaches, to block access if the caller is un-authorized.
The WeatherForecastController just returns a set of random WeatherForecast objects to be displayed on the page FetchData.
Now, let's get started on implementation.
Shared project
We will start here, as this project does not depend on the others.
First, create a new class library, call it Shared:
Delete the Class1.cs file.
NuGet packages
Next, we must add a package to this project, to get access to various functionality regarding authorization and policies.
Add the package "Microsoft.AspNetCore.Authorization". Pick the latest non-preview version!. At the time of writing that is 6.0.8.
This package is needed to be able to add policies.
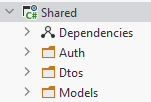
Directories
Create three directories inside the Shared project:
- Auth
- Dtos
- Models
Model classes
Inside the Models directory create a User class. (This is where you may create your own specific class).
public class User
{
    public string Username { get; set; }
    public string Password { get; set; }
    public string Email { get; set; }
    public string Domain { get; set; }
    public string Name { get; set; }
    public string Role { get; set; }
    public int Age { get; set; }
    public int SecurityLevel { get; set; }
}
These properties are just to demonstrate various ways to use auth policies. You may not need them for your own project, but in this tutorial they are useful.
Inside the Models directory create a WeatherForecast class:
public class WeatherForecast
{
    public DateTime Date { get; set; }

    public int TemperatureC { get; set; }

    public int TemperatureF => 32 + (int)(TemperatureC / 0.5556);

    public string? Summary { get; set; }
}
This class will later also be defined by default in Blazor and Web API projects, which must then be deleted. You will be told when.
Dto
Inside the Dtos directory create a UserLoginDto class:
public class UserLoginDto
{
    public string Username { get; init; }
    public string Password { get; init; }
}
Notice the init;. This is a specific kind of set;, meaning you can only set this values, when the object is created, but not later modify it. It is not strictly necessary, but in general it is good practice to only allow what is supposed to be available. We don't intend to change the values after creation, so we don't allow that.
It is just a minor detail. You could just use a constructor instead. I was feeling fancy.
Auth
Finally, the class which will define the policies.
Inside the Auth directory create a class called AuthorizationPolicies:
public static class AuthorizationPolicies
{
    public static void AddPolicies(IServiceCollection services)
    {
        services.AddAuthorizationCore(options =>
        {
            options.AddPolicy("MustBeVia", a =>
                a.RequireAuthenticatedUser().RequireClaim("Domain", "via"));

            options.AddPolicy("SecurityLevel4", a =>
                a.RequireAuthenticatedUser().RequireClaim("SecurityLevel", "4", "5"));

            options.AddPolicy("MustBeTeacher", a =>
                a.RequireAuthenticatedUser().RequireClaim("Role", "Teacher"));

            options.AddPolicy("SecurityLevel2OrAbove", a =>
                a.RequireAuthenticatedUser().RequireAssertion(context =>
                {
                    Claim? levelClaim = context.User.FindFirst(claim => claim.Type.Equals("SecurityLevel"));
                    if (levelClaim == null) return false;
                    return int.Parse(levelClaim.Value) >= 2;
                }));
        });
    }
}
You must import:
- using Microsoft.Extensions.DependencyInjection;
- using System.Security.Claims;
to fix compiler errors. Just do the usual auto-quick-fix.
Now, what's going on here? This static method will be called from the Program.cs classes in both Web API and Blazor, and it will add authorization policies to the framework.
Each line starting with options.AddPolicy... adds a new policy, which can then be used to guard UI elements or Web API endpoints.
The first policy is called "MustBeVia", that's the name of it, and this name is used for reference. Then the lambda expression says:
RequireAuthenticatedUser(), meaning to fulfill this policy the user is logged in, and authenticated.RequireClaim("Domain", "via"), meaning the user must have a claim, where the type is "Domain", and the value is "via". So, the Domain property of that specific User instance must have the value "via".
The next policy, called "SecurityLevel4" also requires an authenticated user, and that the "SecurityLevel"
is either "4" or "5". This illustrates you can add any number of valid values. The RequireClaim method takes first the Claim name, and then any number of arguments.
The third policy, "MustBeTeacher" says that the "Role" of the User must be "Teacher".
The fourth policy, "SecurityLevel2OrAbove", is an example of slightly more complicated logic. We use the method RequireAssertion(), and if the logic inside returns "true", the user fulfills this policy.
The context contains a User property, of the type ClaimsPrincipal. This is a type of object, which the Authentication framework understands, it contains information about the user.
We use FindFirst() to find the first Claim with the Type of "SecurityLevel". If no such claim exists, the user has no security level, and we return "false". If the claim is found, we check if the security level is above a certain value, in this case level 2.
What is a ClaimsPrincipal?
In your project, either this tutorial, or other projects like SEP3, you will probably define some kind of User object, maybe you call it User, Account, Profile, or something else. But it is a class you define to hold information about a user.
This is your own custom object, and the Authentication functionality of Blazor and Web API obviously does not know about your specific user type.
Therefore we must convert our custom User into a class which the framework understands. That class is the ClaimsPrincipal. How it's done will be covered later.
The Web API
Next up is the Web API. We will do the Blazor app last.
Create a new Web API project, give it a name, e.g. "WebAPI":
Add inter-project dependency
We must add a dependency from Web API project to Shared Project, so that the Web API can use classes and functionality defined in the Shared project.
Right click the "Dependencies" inside WebApi project:
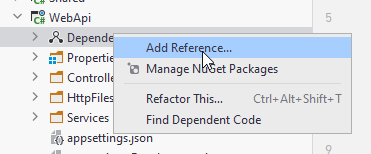
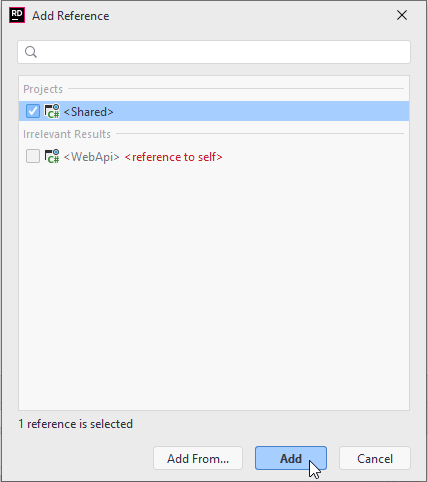
Then in the opened window select the Shared project and click Add.
Clean up
The Web API template project comes with a WeatherForecast.cs class. Delete it.
Open Controllers/WeatherForecastController.cs, and quick fix (alt + enter) the compile error, i.e. import the WeatherForecast class from the Shared/Models.
Add NuGet packages
This project also needs a package to handle JWT creation and authorization.
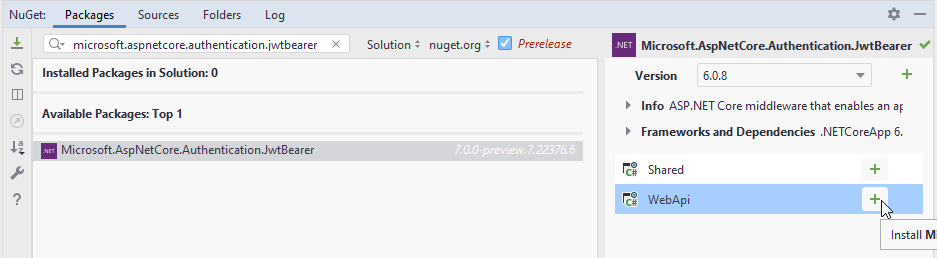
Similarly to how you added a package to the Shared project, add the following package to the Web API project:
- Microsoft.AspNetCore.Authentication.JwtBearer
At the time of writing, the version of the package is 6.0.8. Pick the latest non-preview package.
Modify Program.cs
Open the Program.cs class.
Tell the app to use authentication
Add the following line anywhere above app.Run(), and below var app = builder.Build();. I have put it just under app.UseHttpsRedirection();.
app.UseAuthentication();
This adds authentication middleware, i.e. somewhere between the Web API server receives the request, and our controller endpoint is called, a class will now handle authentication checks, and if the caller is not authenticated or authorized as required, a "401 - Unauthorized" error will be returned to the caller.
NOTE!!
Your Program.cs will now contain the following two lines, somewhere:
app.UseAuthentication();
...
app.UseAuthorization();
It is important that UseAuthentication() comes before UseAuthorization()!
Tell the app to accept requests from the browser
Next, add the following code anywhere above app.Run() and below var app = builder.Build();. I have put it just under the code you inserted before.
app.UseCors(x => x
    .AllowAnyMethod()
    .AllowAnyHeader()
    .SetIsOriginAllowed(origin => true) // allow any origin
    .AllowCredentials());
This is needed later when our Blazor app, running in the browser, needs to contact a URL different from it's own home URL. For security reasons (I believe) this is not allowed by default.
Add authentication with info about JWT
Finally, add the following piece of code anywhere above var app = builder.Build();:
builder.Services.AddAuthentication(JwtBearerDefaults.AuthenticationScheme).AddJwtBearer(options =>
{
    options.RequireHttpsMetadata = false;
    options.SaveToken = true;
    options.TokenValidationParameters = new TokenValidationParameters()
    {
        ValidateIssuer = true,
        ValidateAudience = true,
        ValidAudience = builder.Configuration["Jwt:Audience"],
        ValidIssuer = builder.Configuration["Jwt:Issuer"],
        IssuerSigningKey = new SymmetricSecurityKey(Encoding.UTF8.GetBytes(builder.Configuration["Jwt:Key"]))
    };
});
Import the necessary stuff, quick fix it. A bunch of stuff is happening here. I stole this from an example, so I don't know all the details.
You may notice how we retrieve information from the appsettings.json, e.g. in line 9, 10, 11 above with the:
builder.Configuration["Jwt:Audience"]
This goes to the Jwt section, then the Audience line, getting the value. Similar with the other two lines. Further details below.
Add policies
Add the following line of code anywhere above var app = builder.Build();:
AuthorizationPolicies.AddPolicies(builder.Services);
Quick fix import compile errors.
This is our class from the Shared project, so here we tell the Web API to add authorization policies, which will be used when checking if a client can call an endpoint.
appsettings.json
Open the WebApi/appsettings.json file. This contains various settings for our program.
We need to add information about the JWT to generate.
Add a "Jwt" section, so your file content looks like this:
{
  "Logging": {
    "LogLevel": {
      "Default": "Information",
      "Microsoft.AspNetCore": "Warning"
    }
  },
  "AllowedHosts": "*",
  "Jwt": {
    "Key": "This Is My Random Secret Key Which Is At Least Sixteen Characters",
    "Issuer": "JWTAuthenticationServer",
    "Audience": "JWTServiceBlazorWasmClient",
    "Subject": "JWTServiceAccessToken"
  }
}
Here we have specified various settings to be used when generating the JWT.
- The "Key" is a secret key used when signing the token. It must be at least 16 characters, and can just be anything random.
- The Issuer is who generated the JWT
- The Audience is who the JWT is intended for
- The Subject... I'm not sure
I'm not entirely sure what the purpose is of Issuer, Audience, Subject.
UserService implementation
We need a class to handle various User related logic.
In a normal Web API you might have at least three layers:
- Controllers, to receive incoming requests
- Services, to contain logic, validation, etc
- Repositories/Data Access Objects to manage persisting data
We will skip the third layer, as we are just creating a "dummy database". In this case a List with two Users hardcoded.
The Service
Create a new directory: Services.
Interface
In here, create a new interface: "IAuthService" (or "IAuthLogic" or whatever).
It looks like this:
public interface IAuthService
{
    Task<User> GetUser(string username, string password);
    Task RegisterUser(User user);
}
Import the User.
We are not really going to use the RegisterUser() method, it's just here as an example.
We use return types of Task, even though in this instance nothing will be asynchronous. But, should we wish to improve on the example, e.g. by adding a database, this would require asynchronous code, so it's better to be ready.
Implementation
Next, the implementation, AuthService. Just put this class in the same directory, Services.
It looks like this:
public class AuthService : IAuthService
{

    private readonly IList<User> users = new List<User>
    {
        new User
        {
            Age = 36,
            Email = "trmo@via.dk",
            Domain = "via",
            Name = "Troels Mortensen",
            Password = "onetwo3FOUR",
            Role = "Teacher",
            Username = "trmo",
            SecurityLevel = 4
        },
        new User
        {
            Age = 34,
            Email = "jakob@gmail.com",
            Domain = "gmail",
            Name = "Jakob Rasmussen",
            Password = "password",
            Role = "Student",
            Username = "jknr",
            SecurityLevel = 2
        }
    };

    public Task<User> ValidateUser(string username, string password)
    {
        User? existingUser = users.FirstOrDefault(u =>
            u.Username.Equals(username, StringComparison.OrdinalIgnoreCase));

        if (existingUser == null)
        {
            throw new Exception("User not found");
        }

        if (!existingUser.Password.Equals(password))
        {
            throw new Exception("Password mismatch");
        }

        return Task.FromResult(existingUser);
    }

    public Task RegisterUser(User user)
    {

        if (string.IsNullOrEmpty(user.Username))
        {
            throw new ValidationException("Username cannot be null");
        }

        if (string.IsNullOrEmpty(user.Password))
        {
            throw new ValidationException("Password cannot be null");
        }
        // Do more user info validation here

        // save to persistence instead of list

        users.Add(user);

        return Task.CompletedTask;
    }
}
At the top, we have an IList<User> field. It is instantiated to contain two user objects.
The first method, ValidateUser, will take the two relevant arguments.
The first line of the method will look through the users list, and find the first User object, which matches the
criteria specified by the lambda expression, i.e. a User object with the same username as provided with the method
parameter.
If no object is found, an exception is thrown. This can then be handled somewhere else (in our case the Controllers).
Then the passwords are checked. Again, if the wrong password is provided, an exception is thrown.
Finally, if a user is found, and the password is correct, we return that user object.
We do it with
return Task.FromResult(existingUser)
because the return type is Task<User>, but the method is not marked async. In that case, we need to take the return
variable and put into a Task manually.
The RegisterUser method takes a User object, checks if the username is not null or empty. More checks could be made,
e.g. regarding length or whatever.
Then the password is checked, again, maybe you want to have at least 16 characters, and upper and lower case characters,
and symbols and numbers. You can put that logic here.
You probably also need to check if the username is unique. But all that is not really the purpose of this tutorial, so
it's left out.
The User object is added to the list. Then Task.CompletedTask is return, the equivalent of void, when working with
Task return types.
Notice that if you restart the Web API, your newly registered User is lost, because there is no persistence.
Add service
Finally, we need to add the interface and its implementation as services for the dependency inject framework.
In Program.cs add the following line anywhere above var app = builder.Build();:
builder.Services.AddScoped<IAuthService, AuthService>();
The AuthController
Create a new class in the Controllers directory, call it AuthController.
Add Controller stuff
First, modify it to look like this:
[ApiController]
[Route("[controller]")]
public class AuthController : ControllerBase
Import what is necessary. This now marks this class as an ApiController, so that it's picked up by the Web API.
We specify the route to hit this controller, so that it becomes https://localhost:7130/auth.
Constructor and fields
Next, add the following fields and a constructor:
private readonly IConfiguration config;
private readonly IAuthService authService;

public AuthController(IConfiguration config, IAuthService authService)
{
    this.config = config;
    this.authService = authService;
}
Import what is needed.
Now, when this Controller is created (which happens whenever a request is made), the controller receives an instance of IConfiguration, which is used to read the "appsettings.json", we modified earlier.
We also get an IAuthService injected, i.e. here we just depend on the interface, applying the Dependency Inversion Principle.
Claims generation
We need a method which can take a User (our own custom object) and turn it in to a Collection of Claims, which the programs understand.
private List<Claim> GenerateClaims(User user)
{
    var claims = new[]
    {
        new Claim(JwtRegisteredClaimNames.Sub, config["Jwt:Subject"]),
        new Claim(JwtRegisteredClaimNames.Jti, Guid.NewGuid().ToString()),
        new Claim(JwtRegisteredClaimNames.Iat, DateTime.UtcNow.ToString()),
        new Claim(ClaimTypes.Name, user.Username),
        new Claim(ClaimTypes.Role, user.Role),
        new Claim("DisplayName", user.Name),
        new Claim("Email", user.Email),
        new Claim("Age", user.Age.ToString()),
        new Claim("Domain", user.Domain),
        new Claim("SecurityLevel", user.SecurityLevel.ToString())
    };
    return claims.ToList();
}
Notice the JwtRegisteredClaimNames class is from
using System.IdentityModel.Tokens.Jwt;
Then import the other necessary things with quick fix.
The method takes a User, and creates an array of Claims.
The first three are JWT stuff, recommended to be included. They may not be strictly necessary.
Then follows a Claim for each of the properties of our User object. If we add another property to the User, we must remember to update this method.
In your own projects your User object may look different, have different properties, and so you need to modify the above method accordingly, so that all relevant properties are turned into claims.
JWT generation
This method will generate a JWT to be returned to the caller trying to log in.
private string GenerateJwt(User user)
{
    List<Claim> claims = GenerateClaims(user);

    SymmetricSecurityKey key = new SymmetricSecurityKey(Encoding.UTF8.GetBytes(config["Jwt:Key"]));
    SigningCredentials signIn = new SigningCredentials(key, SecurityAlgorithms.HmacSha512);

    JwtHeader header = new JwtHeader(signIn);

    JwtPayload payload = new JwtPayload(
        config["Jwt:Issuer"],
        config["Jwt:Audience"],
        claims,
        null,
        DateTime.UtcNow.AddMinutes(60));

    JwtSecurityToken token = new JwtSecurityToken(header, payload);

    string serializedToken = new JwtSecurityTokenHandler().WriteToken(token);
    return serializedToken;
}
It is not the purpose of this guide to teach in-depth knowledge about JWT or how it is craeted. The above method will generate the JWT, given a User object. The interested reader is encouraged to research more about JWT themselves.
The first line calls the previous method to get a List of Claims, i.e. our User converted to a list of key-value pairs containing the same information.
A JWT is signed by the server, so it cannot be tampered with. We do that in the next two lines.
We create a JwtPayload containing the relevant information:
- The Issuer, i.e. the server
- The Audience, i.e. the Blazor app
- The claims
- null, whatever that is
- An expiration date/time, meaning this JWT is only valid for a certain time, in this case 60 minutes. You can put whatever you wish here
In the end the JWT is serialized with the signature into a string of seemingly random characters.
Login endpoint
We need a last method, the endpoint to be accessed when making a login request.
It looks like this:
[HttpPost, Route("login")]
public async Task<ActionResult> Login([FromBody] UserLoginDto userLoginDto)
{
    try
    {
        User user = await authService.ValidateUser(userLoginDto.Username, userLoginDto.Password);
        string token = GenerateJwt(user);

        return Ok(token);
    }
    catch (Exception e)
    {
        return BadRequest(e.Message);
    }
}
Do the imports.
We mark the endpoint as a Post request, and put the Route("login") resulting in the URI to hit this endpoint:
https://localhost:7130/auth/login
The method takes a UserLoginDto object, i.e. the class we created containing Username and Password.
The user info is validated, and upon success the JWT is generated and then returned.
If an exception happens, we return BadRequest. This is not particularly fine-grained, as we might wish to return different types of status codes, based on what went wrong. This is generally a better approach, but outside the scope of this tutorial.
We could create various types of exceptions, and catch these specific exceptions across multiple catch-clauses, and return more specific status codes.
Testing the login
It's time to test whether we can log in.
Normally, when you run your Web API, it opens a Swagger page. You can test the Login endpoint from here, and if you provide valid credentials, you should get a JWT back.
However, future calls which requires the JWT attached are more complicated to create with Swagger. We would have to add stuff in the Program.cs, and complicate things.
So, we'll do something else. We could use Postman, that would be easy enough, and if you prefer that, go for it (Postman is a widely used HTTP client).
The .http test file
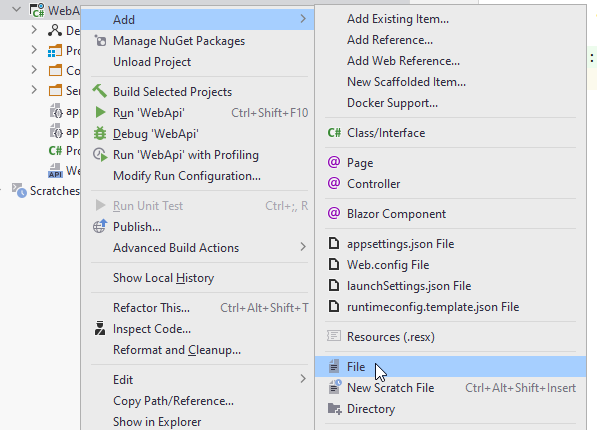
Rider has a built-in Http Client. It's pretty simple.
In the WebApi project folder, create a new file. Call it "WebApiTests.http", or whatever, but the file type is ".http":
And here's the file:
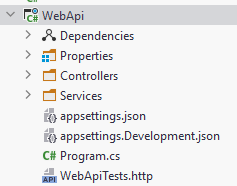
Open the file. In here we can define calls to our Web API.
Input the following:
// log in as Troels
POST https://localhost:7130/auth/login
Content-Type: application/json

{ "Username" : "trmo", "Password" : "onetwo3FOUR" }
The // marks a comment.
Then we define a "POST" request to "https://localhost:7130/auth/login".
We define the Content-Type to be "application/json", i.e. saying the request contains content in the format of JSON.
Finally a JSON object matching the format of our UserLoginDto.
Run the Web API, and then run your test. You should receive a JWT.
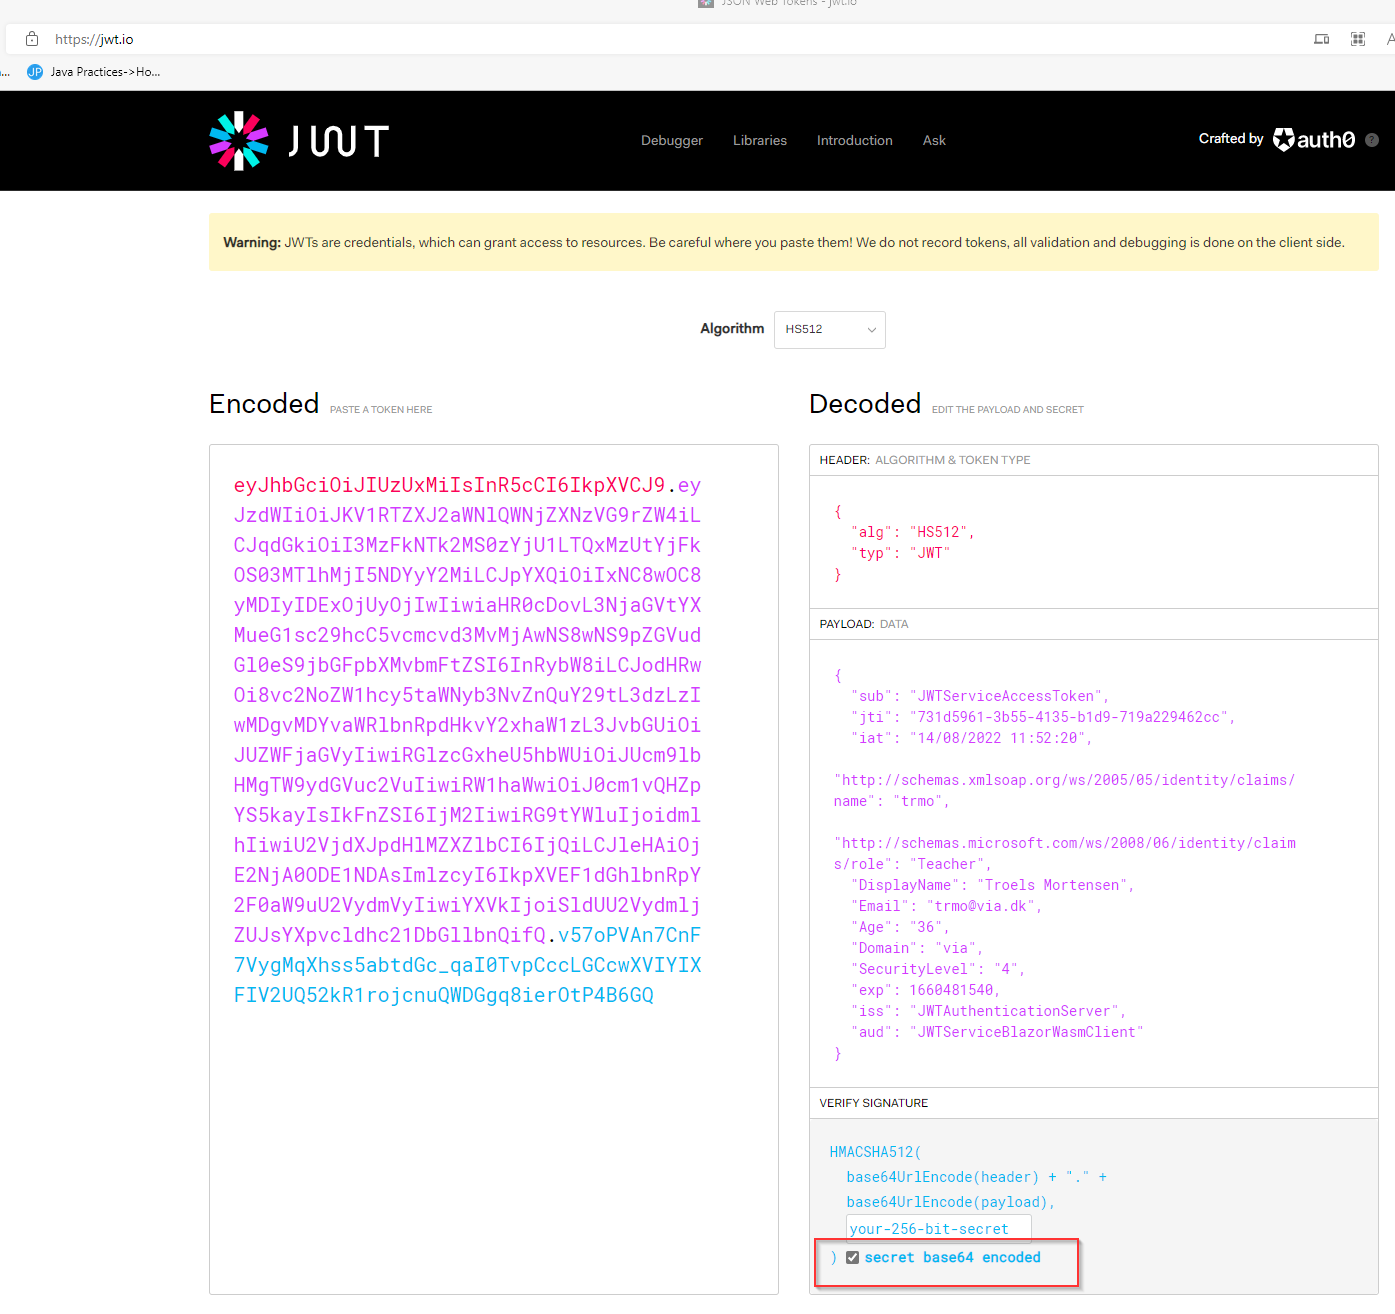
In my test I received the following JWT:
"eyJhbGciOiJIUzUxMiIsInR5cCI6IkpXVCJ9. eyJzdWIiOiJKV1RTZXJ2aWNlQWNjZXNzVG9rZ W4iLCJqdGkiOiI3MzFkNTk2MS0zYjU1LTQxMz UtYjFkOS03MTlhMjI5NDYyY2MiLCJpYXQiOiI xNC8wOC8yMDIyIDExOjUyOjIwIiwiaHR0cDov L3NjaGVtYXMueG1sc29hcC5vcmcvd3MvMjAwN S8wNS9pZGVudGl0eS9jbGFpbXMvbmFtZSI6In RybW8iLCJodHRwOi8vc2NoZW1hcy5taWNyb3N vZnQuY29tL3dzLzIwMDgvMDYvaWRlbnRpdHkv Y2xhaW1zL3JvbGUiOiJUZWFjaGVyIiwiRGlzc GxheU5hbWUiOiJUcm9lbHMgTW9ydGVuc2VuIi wiRW1haWwiOiJ0cm1vQHZpYS5kayIsIkFnZSI 6IjM2IiwiRG9tYWluIjoidmlhIiwiU2VjdXJp dHlMZXZlbCI6IjQiLCJleHAiOjE2NjA0ODE1N DAsImlzcyI6IkpXVEF1dGhlbnRpY2F0aW9uU2 VydmVyIiwiYXVkIjoiSldUU2VydmljZUJsYXp vcldhc21DbGllbnQifQ.A3ncVJsEcfYD5AArX R3F1tKYr7QaL7HQ_ln-kwWZbwXpx2aQz08DgV X2l8CnfZr7FxE8BzsrO7-A1Mru4Gklbg"
If you are interested, you can go to jwt.io to unpack the token:
Guarding
If your program is running, stop it.
Now we need to test how we can apply policies to guard our endpoints in the controllers.
In the Controllers directory, create a new Controller, call it "TestController".
Modify it to look like this:
[ApiController]
[Route("[controller]")]
[Authorize]
public class TestController : ControllerBase
{

}
It's similar to the AuthController, but now notice the extra attribute [Authorize].
This means this Controller can only be interacted with, if the caller provides a valid JWT.
By default all endpoints within this class can only be called with a valid token.
If we leave out the attribute, all endpoints can by default be called by anonymous callers, i.e. no valid token is needed.
It's up to you to decide whether to use it or not. Is your default "all access" or "limited access".
For this test, we include the attribute.
We will create a couple of dummy methods, which just returns "OK", but the point is we will guard these endpoints with policies and authentication.
Authorized guard
The below method has nothing extra attached to it. Add it to the TestController:
[HttpGet("authorized")]
public ActionResult GetAsAuthorized()
{
    return Ok("This was accepted as authorized");
}
This looks like a normal, very simple endpoint. We just return status code 200 - OK. With a message.
The HttpGet("authorized") just indicates the sub-route to this specific endpoint, e.g.:
https://localhost:7271/test/authorized
Right? It's the sub-route. It does not mean this endpoint requires authorized. We fix that later.
Let's test this.
Blocked access
Run your Web API.
Open the WebApiTests.http file.
We can separate multiple requests with ###, so, expand the content of your file to be:
// log in as Troels
POST https://localhost:7271/auth/login
Content-Type: application/json

{ "Username" : "trmo", "Password" : "onetwo3FOUR" }

###

GET https://localhost:7271/test/authorized
Notice the new GET request at the bottom, and the "###" separating it from the one above.
With your Web API running, run the GET request.
The result should be something like:
https://localhost:7271/test/authorized

HTTP/1.1 401 Unauthorized
Content-Length: 0
Date: Sun, 14 Aug 2022 12:07:45 GMT
Server: Kestrel
WWW-Authenticate: Bearer

<Response body is empty>


Response code: 401 (Unauthorized); Time: 76ms; Content length: 0 bytes
The bottom line says, we were not authorized to call this endpoint. That's because we did not provide a valid JWT.
Now with token
Now, first, execute the first login request, resulting in a JWT.
In your .http test file add a new request, remember to separate it with "###":
Copy the JWT, and modify your latest GET request to something like this:
GET https://localhost:7271/test/authorized
Authorization: Bearer eyJhbGciOiJIUzUxMiIsInR5cCI6IkpXVCJ9.eyJzdWIiOiJKV1RTZXJ2aWNlQWNjZXNzVG9rZW4iLCJqdGkiOiJmODhhMDJiMS0wMTdjLTQzOTktYTc3Zi1kMTVlNTk5MDA1ZGYiLCJpYXQiOiIxNC8wOC8yMDIyIDEyOjExOjE2IiwiaHR0cDovL3NjaGVtYXMueG1sc29hcC5vcmcvd3MvMjAwNS8wNS9pZGVudGl0eS9jbGFpbXMvbmFtZSI6InRybW8iLCJodHRwOi8vc2NoZW1hcy5taWNyb3NvZnQuY29tL3dzLzIwMDgvMDYvaWRlbnRpdHkvY2xhaW1zL3JvbGUiOiJUZWFjaGVyIiwiRGlzcGxheU5hbWUiOiJUcm9lbHMgTW9ydGVuc2VuIiwiRW1haWwiOiJ0cm1vQHZpYS5kayIsIkFnZSI6IjM2IiwiRG9tYWluIjoidmlhIiwiU2VjdXJpdHlMZXZlbCI6IjQiLCJleHAiOjE2NjA0ODI2NzYsImlzcyI6IkpXVEF1dGhlbnRpY2F0aW9uU2VydmVyIiwiYXVkIjoiSldUU2VydmljZUJsYXpvcldhc21DbGllbnQifQ.w3qJXGPEYi6MMKH-t03KzryBmT7b7OqGJ6iEePDJuE06SI5hH27PS36Bo6QDrq1b_ykX5S0qxAfyJheSw-EDUA
This is how we provide a JWT along with our request. Notice the token above will not work with you. You will have to log in, and use the token returned. Also remember a new token is required every hour.
Run the last GET request again, with the token. You should get back:
https://localhost:7271/test/authorized

HTTP/1.1 200 OK
Content-Type: text/plain; charset=utf-8
Date: Sun, 14 Aug 2022 12:12:23 GMT
Server: Kestrel
Transfer-Encoding: chunked

This was accepted as authorized

Response code: 200 (OK); Time: 72ms; Content length: 31 bytes
So, providing a valid JWT gives us access.
More policy guarding examples
Currently, we have blocked our controller so that you need a valid JWT to call the endpoints.
Allow anonymous
Maybe we wish to open some of the endpoints to everyone, we can do that with the "AllowAnonymous" attribute:
[HttpGet("allowanon"), AllowAnonymous]
public ActionResult GetAsAnon()
{
    return Ok("This was accepted as anonymous");
}
Create another test request in your .http file to the endpoint https://localhost:7271/test/allowanon .
Notice your port may be different.
Test that you can reach this endpoint without including the JWT.
Guard with policy
Now, we can have open endpoints and endpoints requiring a valid token, i.e. you are logged in. But what about applying a specific policy, i.e. you must be x or have y or whatever.
Try the following endpoint in your TestController:
[HttpGet("mustbevia"), Authorize("MustBeVia")]
public ActionResult GetAsVia()
{
    return Ok("This was accepted as via domain");
}
Here we use the Authorize("MustBeVia") attribute. Remember, in the Shared/Auth/AuthorizationPolicies.cs class we defined a policy named "MustBeVia".
You have two users hardcoded: "trmo", and "jknr". Only "trmo" is has the domain "via".
So, first log in with "trmo", receive the token, and use that token with a GET request to https://localhost:7271/test/mustbevia .
It should be okay.
Then try to modify the login credentials to "jknr" and "password", to log in as Jakob. Copy the received token into your request above, and try again. You should get an Unauthorized response back.
Manual checking
Finally, maybe you don't like to rely on policies. You can leave them out entirely if you wish to do so, and just do the authorization validation manually, i.e. writing that code yourself.
Here's an example endpoint:
[HttpGet("manualcheck")]
public ActionResult GetWithManualCheck()
{
    Claim? claim = User.Claims.FirstOrDefault(claim => claim.Type.Equals(ClaimTypes.Role));
    if (claim == null)
    {
        return StatusCode(403, "You have no role");
    }

    if (!claim.Value.Equals("Teacher"))
    {
        return StatusCode(403, "You are not a teacher");
    }

    return Ok("You are a teacher, you may proceed");
}
Notice there is no Authorize attribute above the method signature.
In the method body, the first line:
We access the User property. This has little to do with your specific User object.
This property comes from the superclass, ControllerBase, and is the same type of ClaimsPrincipal we used in the AuthorizationPolicies.cs class. I.e. it contains information about the user stored in the provided JWT from the request.
You can extract various information from this User, e.g. the claims.
Auth Layer Responsibility
You may spend a little while considering which layer should be responsible for authentication and authorization.
When we apply the attributes, we let the Web API layer be responsible for auth/auth. But what if we swap out this layer, with something else, where auth is not built in? E.g. basic sockets, or maybe a gRPC server (don't know if it has built in auth).
You will have to manually implement auth then. And if you swap out once again, you must redo all the auth.
We have a layer, the Web API, which has two different responsibilities: receiving requests, and auth. This implies we should extract auth-related responsibilities to somewhere else.
Assuming we have the usual three layers of network, logic, and data access, is auth then part of the logic layer? Well, maybe. It could be, but it still feels like something else than business logic.
We could introduce a new layer between network and logic, with the only responsibility of protecting the logic layer. We would still have to extract the user information from the Request, and should then pass that along to the lower layers.
It does potentially get a little elaborate, and we probably are not going to swap out the networking all the time.
This discussion is just to get you thinking.
WeatherForecastController
This class came with the Web API project template. We haven't touched it much, but let's use this as a slightly closer real life example.
Open the class.
Put the [Authorize] attribute above the class definition, i.e. line 9 or so. Now, we can only access the GET endpoint with a valid token.
This concludes the Web API part of the tutorial.
Next up, we take a look at the Blazor side of things.
Blazor
Now we start on the front end of things.
We will see how to make a login request to our web api, receive a JWT and use that to guard various parts of the app.
We will also include the JWT in requests to the server.
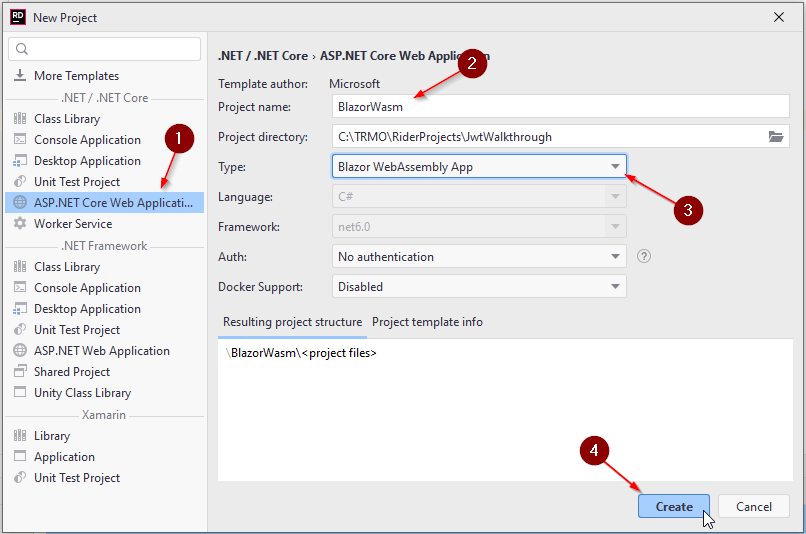
Create project
We start by adding a new project, of type Blazor-WASM.
Add packages
Again, we need to add a package to your new Blazor-WASM project:
- Microsoft.AspNetCore.Components.Authorization
Remember to pick the latest non-preview version.
Add reference
Add a project-reference to Shared, similar to what we did with the Web API, so that we get access to the models and the policy setup in that library.
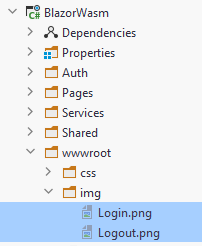
Icons
We are going to use two icons for login and logout. It's not strictly necessary, but let's try it out.
You should be able to right click and download the two images below:


Place them here in your blazor project:
Wrap in Auth
We need to make available authentication across our app.
Open BlazorWasm/App.razor. Modify it to look as follows:
<CascadingAuthenticationState>
    <Router AppAssembly="@typeof(App).Assembly">
        <Found Context="routeData">
            <AuthorizeRouteView RouteData="@routeData" DefaultLayout="@typeof(MainLayout)">
                <NotAuthorized>
                    <img width="600" src="https://i.kym-cdn.com/entries/icons/original/000/002/144/You_Shall_Not_Pass!_0-1_screenshot.jpg"/>
                    <p>You'll have to log in!</p>
                </NotAuthorized>
            </AuthorizeRouteView>
            <FocusOnNavigate RouteData="@routeData" Selector="h1"/>
        </Found>
        <NotFound>
            <PageTitle>Not found</PageTitle>
            <LayoutView Layout="@typeof(MainLayout)">
                <p role="alert">Sorry, there's nothing at this address.</p>
            </LayoutView>
        </NotFound>
    </Router>
</CascadingAuthenticationState>
The yellow highlighted lines contains the changes. We wrap everything in <CascadingAuthenticationState>. And the <RouteView> is changed to <AuthorizeRouteView>.
Everything inside the <NotAuthorized> tags (lines 5 and 8) is HTML to be shown, if the user tries to access something, they are not authorized to access.
Imports
You should now see that the tag <CascadingAuthenticationState> is a different color than e.g. <Router...>.
That's because Blazor recognizes the second tag as a Blazor component, and the first tag is not currently recognized, so it's just colored as HTML.
We need an import statement.
Open the file BlazorWasm/_imports.razor. At the end, add the following two using statements:
@using Microsoft.AspNetCore.Components.Authorization
@using Microsoft.AspNetCore.Authorization
Go back to App.razor, and verify the color change, indicating <CascadingAuthenticationState> is now recognized as a component. The result is that in every page or component, we can request information about the logged in user. That is convenient.
The "_imports.razor" file is used to make global imports, i.e. if we put a @using statement in this file, all pages implicitly have that @using statement. It can be very convenient, instead of having specific imports in each file.
AuthService class
This class handles login requests, user-registration requests (not covered in tutorial), and logging out.
Directories
Inside the project folder create a new directory: Services. Inside that create a directory: HTTP.
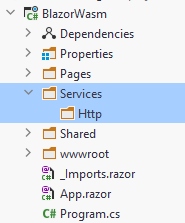
We don't strictly need the HTTP directory, it's just to organize things. In this folder we put service implementations related to HTTP, i.e. REST and our Web API. If we later wanted other services using e.g. gRPC or other, we could create another directory for that. It's just a detail.
These classes should actually be in a separate component, as you saw in the Blazor tutorial. But we keep it simple here.
IAuthService interface
In the Service directory create an interface, IAuthService.
It looks like this:
using System.Security.Claims;
using Shared.Models;

namespace BlazorWasm.Services;

public interface IAuthService
{
    public Task LoginAsync(string username, string password);
    public Task LogoutAsync();
    public Task RegisterAsync(User user);
    public Task<ClaimsPrincipal> GetAuthAsync();

    public Action<ClaimsPrincipal> OnAuthStateChanged { get; set; }
}
Fix imports.
All methods return Tasks, to support asynchronous programming.
The first method is used to log in, from a log in page.
The second is to log out, i.e. clear your authentication state and become anonymous.
Then a method to register a new user, though not covered in this tutorial.
The GetAuthAsync() method is used to provide authentication state details to the Blazor auth framework, whenever the app needs to know about who is logged in.
The last is an Action, which will fire an event whenever the authentication state changes, i.e. upon log in or log out.
JwtAuthService
In the HTTP directory create a class "JwtAuthService.cs".
It's a long class, we'll cut it up. The end result is found on GitHub here.
Fields
This is the start of the class:
public class JwtAuthService : IAuthService
{
    private readonly HttpClient client = new ();

    // this private variable for simple caching
    public static string? Jwt { get; private set; } = "";

    public Action<ClaimsPrincipal> OnAuthStateChanged { get; set; } = null!;
It implements the interface IAuthService, so we must provide implementations for the methods defined in the interface.
The HttpClient is created, but should be injected instead as shown in the Blazor tutorial.
We have a static public field variable called Jwt. This will hold the token received from the Web API when logged in.
It is static because other services need this token when making requests to the Web API, we will see that later.
The variable being static provides easier access to it. There are other ways to achieve easy access as well, e.g. keep it in another class, registered as a service, injected where needed.
Normally static references results in tight couplings, i.e. something to avoid. But the coupling is only within the same layer, so we allow it here. The coupling can be loosened, but that is not relevant for this tutorial.
The last line is the implementation of the Action. Now, other classes can subscribe and listen for events being fired about the authentication state changing. We will need that later.
Parsing the JWT
We will need functionality to convert the JWT received from the Web API into Claims with information about the user logged in.
Paste in the below two methods:
// Below methods stolen from https://github.com/SteveSandersonMS/presentation-2019-06-NDCOslo/blob/master/demos/MissionControl/MissionControl.Client/Util/ServiceExtensions.cs
private static IEnumerable<Claim> ParseClaimsFromJwt(string jwt)
{
    string payload = jwt.Split('.')[1];
    byte[] jsonBytes = ParseBase64WithoutPadding(payload);
    Dictionary<string, object>? keyValuePairs = JsonSerializer.Deserialize<Dictionary<string, object>>(jsonBytes);
    return keyValuePairs!.Select(kvp => new Claim(kvp.Key, kvp.Value.ToString()!));
}

private static byte[] ParseBase64WithoutPadding(string base64)
{
    switch (base64.Length % 4)
    {
        case 2:
            base64 += "==";
            break;
        case 3:
            base64 += "=";
            break;
    }

    return Convert.FromBase64String(base64);
}
How they work is irrelevant. Consider it black magic. The argument is the JWT, the result is a collection of Claims about the user.
Creating the ClaimsPrincipal
We need a method to create a ClaimsPrincipal. Remember, this is the type of "User" object the Blazor auth-framework understands. So the JWT is converted into a ClaimsPrincipal with the following method:
private static ClaimsPrincipal CreateClaimsPrincipal()
{
    if (string.IsNullOrEmpty(Jwt))
    {
        return new ClaimsPrincipal();
    }

    IEnumerable<Claim> claims = ParseClaimsFromJwt(Jwt);

    ClaimsIdentity identity = new(claims, "jwt");

    ClaimsPrincipal principal = new(identity);
    return principal;
}
If there is no JWT, i.e. no user is logged in, we return an "empty" ClaimsPrincipal. This is then anonymous.
Otherwise, we get the Claims from the JWT. We put those claims into a ClaimsIdentity, a kind of sub-user. We state the auth-type is "jwt".
This ClaimsIdentity is then provided to a ClaimsPrincipal. I believe a ClaimsPrincipal may contain multiple Identities, though that's beyond this tutorial.
That's enough of helper methods. You may notice they are all private and static. They don't need to be static, but as they are just helper methods, making them static is in some cases a small optimization. It's just a detail, you don't need to do it.
Login method
Now, the login method. It looks like this:
public async Task LoginAsync(string username, string password)
{
    UserLoginDto userLoginDto = new()
    {
        Username = username,
        Password = password
    };

    string userAsJson = JsonSerializer.Serialize(userLoginDto);
    StringContent content = new(userAsJson, Encoding.UTF8, "application/json");

    HttpResponseMessage response = await client.PostAsync("https://localhost:7130/auth/login", content);
    string responseContent = await response.Content.ReadAsStringAsync();

    if (!response.IsSuccessStatusCode)
    {
        throw new Exception(responseContent);
    }

    string token = responseContent;
    Jwt = token;

    ClaimsPrincipal principal = CreateClaimsPrincipal();

    OnAuthStateChanged.Invoke(principal);
}
We could have used the PostAsJsonAsync() method.
First a UserLoginDto object is created with username and password. Remember, this is what the Web API needs to validate a user.
The object is serialized into JSON. That JSON is put into a StringContent object,
using Encoding UTF8, and specifying the content is in JSON-format.
We make a Post request in line 12, and in line 13 we read the response content, which should be our JWT.
Remember to change the port to match your Web API's! Or if you are injecting the HttpClient, remove some of the URI.
If there is a problem with the request, i.e. we get an error code back, we throw an Exception. This exception is caught in a page, and an error message is shown to the user. It is always very important to give feedback to the user, both upon success and failure.
We assign the received JWT to the property Jwt. This property is a form of cache. From wiki:
A cache...
... is a hardware or software component that stores data so that future requests for that data can be served faster
It's just a temporary storage to hold data which is needed in the future. If we didn't store the JWT we would need to log in all the time. It wouldn't work. This cache is simple, and the last part of this tutorial will cover small improvements. But we start out simple.
We get the ClaimsPrincipal and finally invoke the Action to notify whoever is interested about the change in authentication state.
Register service
Finally, we need to register the interface and implementation as a service, so the app can use them for dependency injection.
Open BlazorWasm/Program.cs, add the line:
builder.Services.AddScoped<IAuthService, JwtAuthService>();
The Authentication State Provider class
Your Blazor app often needs to evaluate what to show to the user based on their credentials. As mentioned in the beginning, you can show/hide parts of your UI based on the user being logged in or not, and based on their data, i.e. Claims.
The app need to get access to this authentication state, and that happens through a class, which we extend.
Create a new directory in BlazorWasm, call it "Auth".
In here create the class CustomAuthProvider:
using System.Security.Claims;
using BlazorWasm.Services;
using Microsoft.AspNetCore.Components.Authorization;

namespace BlazorWasm.Auth;

public class CustomAuthProvider: AuthenticationStateProvider
{
    private readonly IAuthService authService;

    public CustomAuthProvider(IAuthService authService)
    {
        this.authService = authService;
        authService.OnAuthStateChanged += AuthStateChanged;
    }

    public override async Task<AuthenticationState> GetAuthenticationStateAsync()
    {
        ClaimsPrincipal principal = await authService.GetAuthAsync();

        return new AuthenticationState(principal);
    }

    private void AuthStateChanged(ClaimsPrincipal principal)
    {
        NotifyAuthenticationStateChanged(
            Task.FromResult(
                new AuthenticationState(principal)
            )
        );
    }
}
The Blazor framework knows about the abstract superclass, AuthenticationStateProvider. We then provide a subclass, which can give the app the authentication state it requires, in the form of a ClaimsPrincipal.
So, whenever the app needs to know whether it should show or hide some piece of UI, it will ask our class here about the user credentials, i.e. a ClaimsPrincipal, and then evaluate accordingly.
The field variable is a reference to the IAuthService interface we just created on the previous slide. Notice that we don't know anything about the implementation, or whether JWT is used or whatever. Again, Dependency Inversion Principle. If we wish to change authentication strategy, we can do that isolated.
The constructor receives the instance of IAuthService, i.e. we use dependency injection.
And then we subscribe to the OnAuthStateChanged event from the IAuthService, line 14. I.e. whenever the authentication state changes through logging in or out, this class wants to know about it, and react to it.
What this class then does is call the method NotifyAuthenticationStateChanged(), which is located in the AuthenticationStateProvider, i.e. the superclass. This will cause the app to update.
The method GetAuthenticationStateAsync() is called whenever the blazor app needs to know whether to block or show some UI piece.
Here we just retrieve the ClaimsPrincipal from the IAuthService and return it.
Register service
We must tell the blazor app to use our implementation. Open Program.cs, and include the line:
builder.Services.AddScoped<AuthenticationStateProvider, CustomAuthProvider>();
Fix imports.
Add policies
In Program.cs add the following line:
AuthorizationPolicies.AddPolicies(builder.Services);
This will add the same policies to your Blazor app as to your Web API. It's convenient to define them in just one place when they need to be the same.
The login page
We need to be able to log in. This requires a page where we can input our credentials.
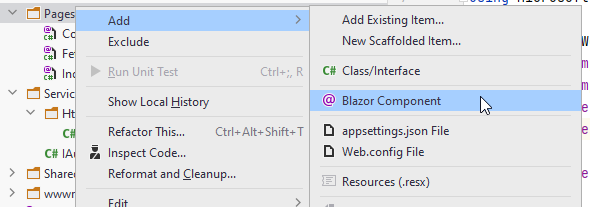
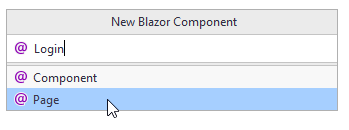
In the Pages directory, create a new page:
And then input name, and select "Page":
The code
At the top of the file, you should have these four lines:
@page "/Login"
@using BlazorWasm.Services
@inject IAuthService authService
@inject NavigationManager navMgr
We declare the page directive, i.e. the sub-uri to get to the Login page.
There is a using statement, and then two @inject statements. This gives us an instance of IAuthService (i.e. the JwtAuthService) and an instance of the NavigationManager.
The code block is here:
@code {
    private string userName;
    private string password;
    private string errorLabel;

    private async Task LoginAsync()
    {
        errorLabel = "";
        try
        {
            await authService.LoginAsync(userName, password);
            navMgr.NavigateTo("/");
        }
        catch (Exception e)
        {
            Console.WriteLine(e);
            errorLabel = $"Error: {e.Message}";
        }
    }
}
We have private fields to hold the username, the password, and any error message we might need to show to the user.
The LoginAsync() method will delegate to the IAuthService, attempting to log in. If successful, we use the NavigationManager to navigate to the home page.
In the case of any exceptions, we catch them and display the error message through the errorLabel.
The view
The below is the html/razor syntax for the view of the Login page:
<AuthorizeView>
    <NotAuthorized>
        <div class="card">
            <h3>Please login</h3>
            <div class="field">
                <label>User name:</label>
                <input type="text" @bind="userName"/>
            </div>
            <div class="field">
                <label style="text-align: center">Password:</label>
                <input type="password" @bind="password"/>
            </div>
            @if (!string.IsNullOrEmpty(errorLabel))
            {
                <div class="field">
                    <label style="color: red">
                        @errorLabel
                    </label>
                </div>
            }
            <div class="field">
                <button class="loginbtn" @onclick="LoginAsync">Log in</button>
            </div>
        </div>
    </NotAuthorized>
    <Authorized>
        <div class="card">
            <h3>Hello, @context.User.Identity.Name</h3>
        </div>
    </Authorized>
</AuthorizeView>
So, what's going on here?
We wrap everything in the <AuthorizeView> component.
Inside this tag (Blazor component) we have access to information about the ClaimsPrincipal representing the currently logged in user.
Notice the two sub-tags: <NotAuthorized> and <Authorized>.
- The first is "active" if no one is logged in, i.e. all the html inside this tag is displayed.
- The second contains html shown if the user is logged in.
NotAuthorized
In the NotAuthorized part we have two input fields for the username and password.
If the errorLabel contains something, we display that text.
At the bottom we have the button, which when pressed calls the LoginAsync() method.
Authorized
Inside the Authorized part we have access to the context, a variable of type AuthenticationState,
so we can access the contained ClaimsPrincipal, and get the Name. Or any Claim we might want.
The Name property is set specifically, when you add a Claim to the ClaimsPrincipal with the ClaimsType of ClaimsType.Name. We did this in the Web API's AuthController:
new Claim(ClaimTypes.Name, user.Username)
``
Styling
Add a style-behind to make the Login page look nicer. It could contain the following css:
.card {
    box-shadow: 0 4px 8px 0 rgba(0,0,0,0.2);
    transition: 0.3s;
    width: 250px;
    padding: 25px;
    text-align: center;
    margin: auto;
    margin-top: 50px;
}

.field {
    margin-top: 20px;
}

.loginbtn {
    background-color:lightgreen;
    border-radius: 5px;
    padding: 5px;
    padding-left: 10px;
    padding-right: 10px;
}

.loginbtn:hover{
    transform: scale(1.1);
    box-shadow: 0 2px 10px 2px #3f3f3f;
}
The result should be this look:
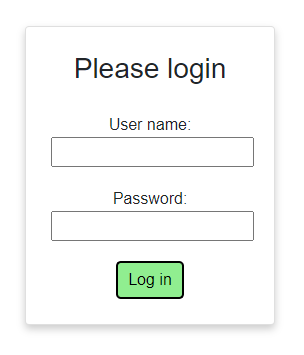
You can check by running your Blazor app, and manually put in
https://localhost:7105/login
in the browser address bar. Maybe with another port.
Login buttons
We can't have the user type in manually in the search bar every time they wish to log in.
Let's make some buttons for this, and put them somewhere convenient.
Create a new Blazor Component in the Pages directory, call it LoginButtons.
The code
This is where we start, leaving out the view part:
@using BlazorWasm.Services
@namespace Login
@inject NavigationManager navMgr
@inject IAuthService authService

...

@code {

    private void Login()
    {
        navMgr.NavigateTo("/Login");
    }

    private async Task Logout()
    {
        await authService.LogoutAsync();
        navMgr.NavigateTo("/");
    }

}
Notice there is no page directive here, so this is not a page we can navigate to. It is instead a piece of UI to be used in other components or pages.
We inject a NavigationManager and the IAuthService at the top.
In the code, we have a method to navigate to the Login page, and a method to log out. This Logout() method will tell the IAuthService to clear the logged in user, and then tell the app to navigate to the home page.
The view
In step 11 you were asked to download the login and logout icons, and put them in the wwwroot/img folder. We'll use these icons now.
Here's the view:
<AuthorizeView>
    <Authorized>
        <img class="icon" src="img/Logout.png" @onclick="Logout"/>
    </Authorized>
    <NotAuthorized>
        <img class="icon" src="img/Login.png" @onclick="Login"/>
    </NotAuthorized>
</AuthorizeView>
Everything is wrapped in the AuthorizeView component, so that we inside get access to the authentication state, i.e. is someone logged in or not?
If the user is Authorized, i.e. logged in, we show the Logout icon, and attach the Logout() method to the on-click event.
If the user is not Authorized, i.e. not logged in, we display the Login icon.
Styling
Create a style behind, and add this styling:
.icon {
    width: 30px;
    cursor: pointer;
}
Adding the buttons to the UI
Finally, open the Shared/MainLayout.razor component. We want to add the buttons to the top bar of the app.
We do that by adding the LoginButtons component to the MainLayout, like so:
@inherits LayoutComponentBase
@using Login

<div class="page">
    <div class="sidebar">
        <NavMenu/>
    </div>

    <main>
        <div class="top-row px-4">
            <LoginButtons/>
        </div>

        <article class="content px-4">
            @Body
        </article>
    </main>
</div>
There used to be a link to some "about". We don't need that.
Testing the log in
We should now be able to test the login functionality.
Start the Web API.
Start the Blazor app.
In the top right corner of the app, in the grey bar, you should see the Login icon.
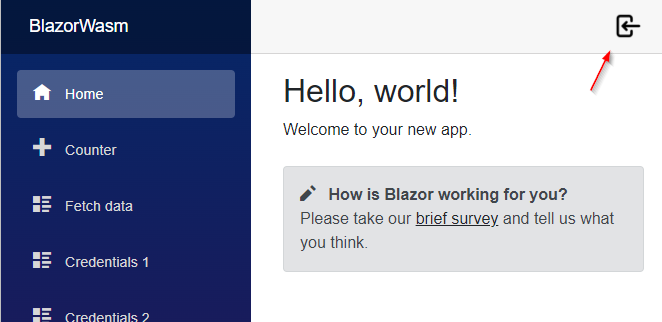
Click it.
Type in:
User name: trmo
Password: onetwo3FOUR
Click Log in
Hopefully everything works as intended. You should be shown the home page and notice the login icon changed to a logout icon, i.e. the arrow points out of the rectangle.
Authorization functionality
Now that the login works, what can we actually do with it?
- We can show or hide certain parts of the UI. We have already seen that with e.g. the login/logout button.
- We can access information about the logged in user
- We can block access to various pages
We'll go over the various examples over the next few slides.
Blocking access to a page
If there are pages you don't want anonymous users to access, you can block them similarly to how we blocked an entire Web API Controller: with the Authorize attribute.
Let's try.
Create a new Blazor page, you can call it "MustBeLoggedInToView.razor", or whatever.
The content of the page looks like this:
@page "/MustBeLoggedInToView"
@attribute [Authorize]

<h3>Must Be Logged In To View</h3>

<p>You can only access this page, if you're logged in. Given that you're seeing this, you're logged in</p>
It's very simple, nothing much going on. There is no code block.
The thing to notice is the second line:
@attribute [Authorize]
This piece of code says that this page is only displayed when you are logged in.
Let's test this.
Open the Shared/NavMenu component. Add an extra nav menu item:
<div class="@NavMenuCssClass" @onclick="ToggleNavMenu">
    <nav class="flex-column">
        <div class="nav-item px-3">
            <NavLink class="nav-link" href="" Match="NavLinkMatch.All">
                <span class="oi oi-home" aria-hidden="true"></span> Home
            </NavLink>
        </div>
        <div class="nav-item px-3">
            <NavLink class="nav-link" href="counter">
                <span class="oi oi-plus" aria-hidden="true"></span> Counter
            </NavLink>
        </div>
        <div class="nav-item px-3">
            <NavLink class="nav-link" href="fetchdata">
                <span class="oi oi-list-rich" aria-hidden="true"></span> Fetch data
            </NavLink>
        </div>
        <div class="nav-item px-3">
            <NavLink class="nav-link" href="MustBeLoggedInToView">
                <span class="oi oi-list-rich" aria-hidden="true"></span> Must Be Logged In
            </NavLink>
        </div>
    </nav>
</div>
Test
Run Web API and Blazor again. Without logging in, try to access the page.
You should see Gandalf blocking your way.
Now log in, and try again.
Adding policy
Currently you can view the page if you are logged in. But you can also apply a policy, only granting access if the logged in user fulfills that policy.
It's done with this line instead:
@attribute [Authorize("MustBeVia")]
Now, the user must fulfill the "MustBeVia" policy.
Test this by rerunning Web API and Blazor. First log in as Jakob:
jknr/password
Try to access the page. You should be blocked by Gandalf.
Log out, and in again as
trmo/onetwo3FOUR
and try the page. You should have access.
The Authentication Context
Sometimes you wish to display things to the user about their credentials, or based on their credentials.
When inside an <AuthorizeView> in the view part of a page, we get access to the context, a variable containing this information about the logged in user. It was mentioned before.
Let's create a page, which displays a user's Claims.
Create a new page, you could call it "ShowCredentialsFromContext".
It looks like this:
@page "/ShowCredentialsFromContext"
@using System.Security.Claims

<h3>Show Credentials 1</h3>
<p>Here we can see the users credentials</p>
<AuthorizeView>
    <Authorized>
        <h3>Hello @context.User.Identity.Name</h3>
        <p>@context.User.Claims.First(claim => claim.Type.Equals(ClaimTypes.Role)).Value</p>
        <p>
            Your claims include:
            <ol>
                @foreach (Claim claim in context.User.Claims)
                {
                    <li>
                        <label>@claim.Type: @claim.Value</label>
                    </li>
                }
            </ol>
        </p>
    </Authorized>
    <NotAuthorized>
        <p>You are not logged in.</p>
    </NotAuthorized>
</AuthorizeView>

<AuthorizeView Policy="MustBeVia">
    <p>You are VIA</p>
</AuthorizeView>
Similar to the Login page, we have the <Authorized> and <NotAuthorized>.
The content of each is shown based on your logged in states, as mentioned before.
In line 8, we have this:
<h3>Hello @context.User.Identity.Name</h3>
We get access to the context, an AuthenticationState. It contains a ClaimsPrincipal, i.e. the .User.
This then contains the Identity, and here we can get the Name.
Remember this Name was set with a Claim of a specific Type in the Web API's AuthController:
new Claim(ClaimTypes.Name, user.Username)
Now look at line 9, here we access the Claims to find the Role of the user.
And further down we display all the Claims through the foreach-loop.
Remember to add it to the nav menu for easy testing. Or manually type in the URL.
Block view with policy
You can block an entire page, but you can also block just part of a page, based on a policy. You can see that at the bottom of the code block above, lines 27-29.
The Authentication State
The previous slide showed how to get user information in the view part.
What if you need it in the code block?
Maybe you are about to create a Product, and you wish to extract the user name or user id to set as owner.
Maybe one method does different things based on your Claims.
Whatever your reason or need, you can get access to the information.
Let's try an example. We will do the same as the previous page, it will look the same to the user, but the programming is different.
Create a new page, you can call it "ShowCredentialsFromAuthState", or something else.
It looks like this:
@page "/ShowCredentialsFromAuthState"
@using System.Security.Claims

<h3>Show Credentials 2</h3>
<p>Here we can see the users credentials</p>

@if (isLoggedIn)
{
    <h3>Hello @name</h3>
    <p>
        Your claims include:
        <ol>
            @foreach (Claim claim in userClaims!)
            {
                <li>
                    <label>@claim.Type: @claim.Value</label>
                </li>
            }
        </ol>
    </p>
}
else
{
    <p>You are not logged in.</p>
}

@code {

    [CascadingParameter]
    public Task<AuthenticationState> AuthState { get; set; } = null!;

    private string? name;
    private IEnumerable<Claim>? userClaims;
    private bool isLoggedIn;

    protected override async Task OnInitializedAsync()
    {
        AuthenticationState authState = await AuthState;
        ClaimsPrincipal user = authState.User;
        isLoggedIn = user.Identity != null;

        if (!isLoggedIn) return;

        userClaims = user.Claims;
        name = user.Identity!.Name!;
    }

}
We have a bit more going on here. The view part is less complex this time, though.
We have a boolean isLoggedIn and if it is true, we display the nameand also all the claims of the user.
Otherwise we just display "You are not logged in".
So, no Authorize components or other stuff in the view to block/hide/show things.
Let's take a look at the code.
The first property is the AuthenticationState, i.e. logged in information.
It is marked with [CascadingParameter]. This is because it is set from a parent component far away.
Remember how we modified the App.razor to wrap everything in <CascadingAuthenticationState>?
This component will set the AuthenticationState on all components/pages in your app, if they request it, like we do with this property.
We also have the property to contain the name of the user, and a collection of claims, and then the boolean to see if the user is logged in.
Now, the method OnInitializedAsync().
Remember, this is automatically called whenever the page is loaded.
First line, we await the AuthState, to receive the AuthenticationState. From that we pull out the ClaimsPrincipal in line 39.
Then, if there is an Identity, it means the user is logged in.
We can pull out the claims and name of the user.
In the previous slide we saw how to show something if the user fulfilled the "MustBeVia" policy.
Now, we can in the code just pull out the Domain claim, and check if the value is "via", and then use a boolean to show/hide something in the UI.
So, we don't strictly need to define policies, but they make things a lot easier if the same rules apply to several parts of your app.
The End (almost)
This concludes the basic tutorial. A few more slides may eventually follow, to talk about some minor optimizations.
But for now, you should have a working login system, and you should have an understanding of how you can guard various parts of both Web API and Blazor app.
Optimization
Under construction...